This page takes you from no feature flags to a flag your application checks at runtime. You’ll create a flag in Octopus, connect your application to the Octopus feature flag service, evaluate the flag in code, and turn it on for an environment.
Create a feature flag
A feature flag lives in an Octopus project. Create one for each feature you want to control independently.
Before you begin
You’ll need:
- An Octopus project that deploys the application you want to add the flag to.
- [VERIFY: the permission required to create feature flags, for example FeatureToggleEdit — needs: confirmation of the permission name shown in the Octopus UI]
To create a feature flag:
- From your project, select Feature Flags.
- Select Add Feature Flag.
- Enter a Name for the flag.
- [VERIFY: the label of the button that creates the flag — needs: confirmation from the Add Feature Flag dialog]
The flag appears in the project’s feature flag list. Octopus generates a slug from the name, which is how your application refers to the flag.
Add the Octopus provider to your application
Your application evaluates flags through the OpenFeature SDK, using the Octopus provider to fetch flag values from the Octopus feature flag service. Do this once per application.
To add the Octopus provider:
- Install the OpenFeature SDK for your language.
- Install the Octopus provider for your language.
- In your application’s startup code, create the Octopus provider with your client identifier and set it as the OpenFeature provider.
For example, in an ASP.NET application:
// Read the client identifier from configuration
var builder = WebApplication.CreateBuilder(args);
var octopusFeatureFlagsClientId = builder.Configuration["FeatureFlags:ClientId"] ?? "";

// Create the Octopus provider
var octopusProvider = new OctopusFeatureProvider(new OctopusFeatureConfiguration(octopusFeatureFlagsClientId));

// Set Octopus as the OpenFeature provider
await OpenFeature.Api.Instance.SetProviderAsync(octopusProvider);Each provider’s README covers setup for that language.
Projects that use feature flag rules need a minimum provider version. See OpenFeature providers for the versions.
Next, give your application its client identifier during deployment.
Supply the client identifier during deployment
The client identifier is a JWT that names the project, environment, and tenant (if applicable) your application belongs to. Octopus provides it in the Octopus variable, so you can inject the right value for each environment and tenant as you deploy.
Before you begin
You’ll need:
- A deployment step that can substitute Octopus variables into your application’s configuration, such as structured configuration variables or substitute variables in templates.
To supply the client identifier during deployment:
- In your application’s configuration file, add a setting for the client identifier with the value
#{Octopus..FeatureFlags .ClientIdentifier} - In your deployment process, turn on variable substitution for that configuration file.
- Deploy a release to the environment.
For example, an appsettings file could contain:
{
  "FeatureFlags": {
    "ClientId": "#{Octopus.FeatureFlags.ClientIdentifier}"
  }
}The deployed configuration file contains a client identifier for the environment, and tenant if applicable, that you deployed to.
Earlier versions of these docs used the variable Octopus. It still works as a deprecated alias of Octopus.
Get a client identifier for an application Octopus doesn’t deploy
If Octopus doesn’t deploy your application, or you can’t inject the client identifier during deployment, you can generate one in the Octopus Web Portal and add it to your configuration yourself.
To get a client identifier:
- From your project, select Feature Flags.
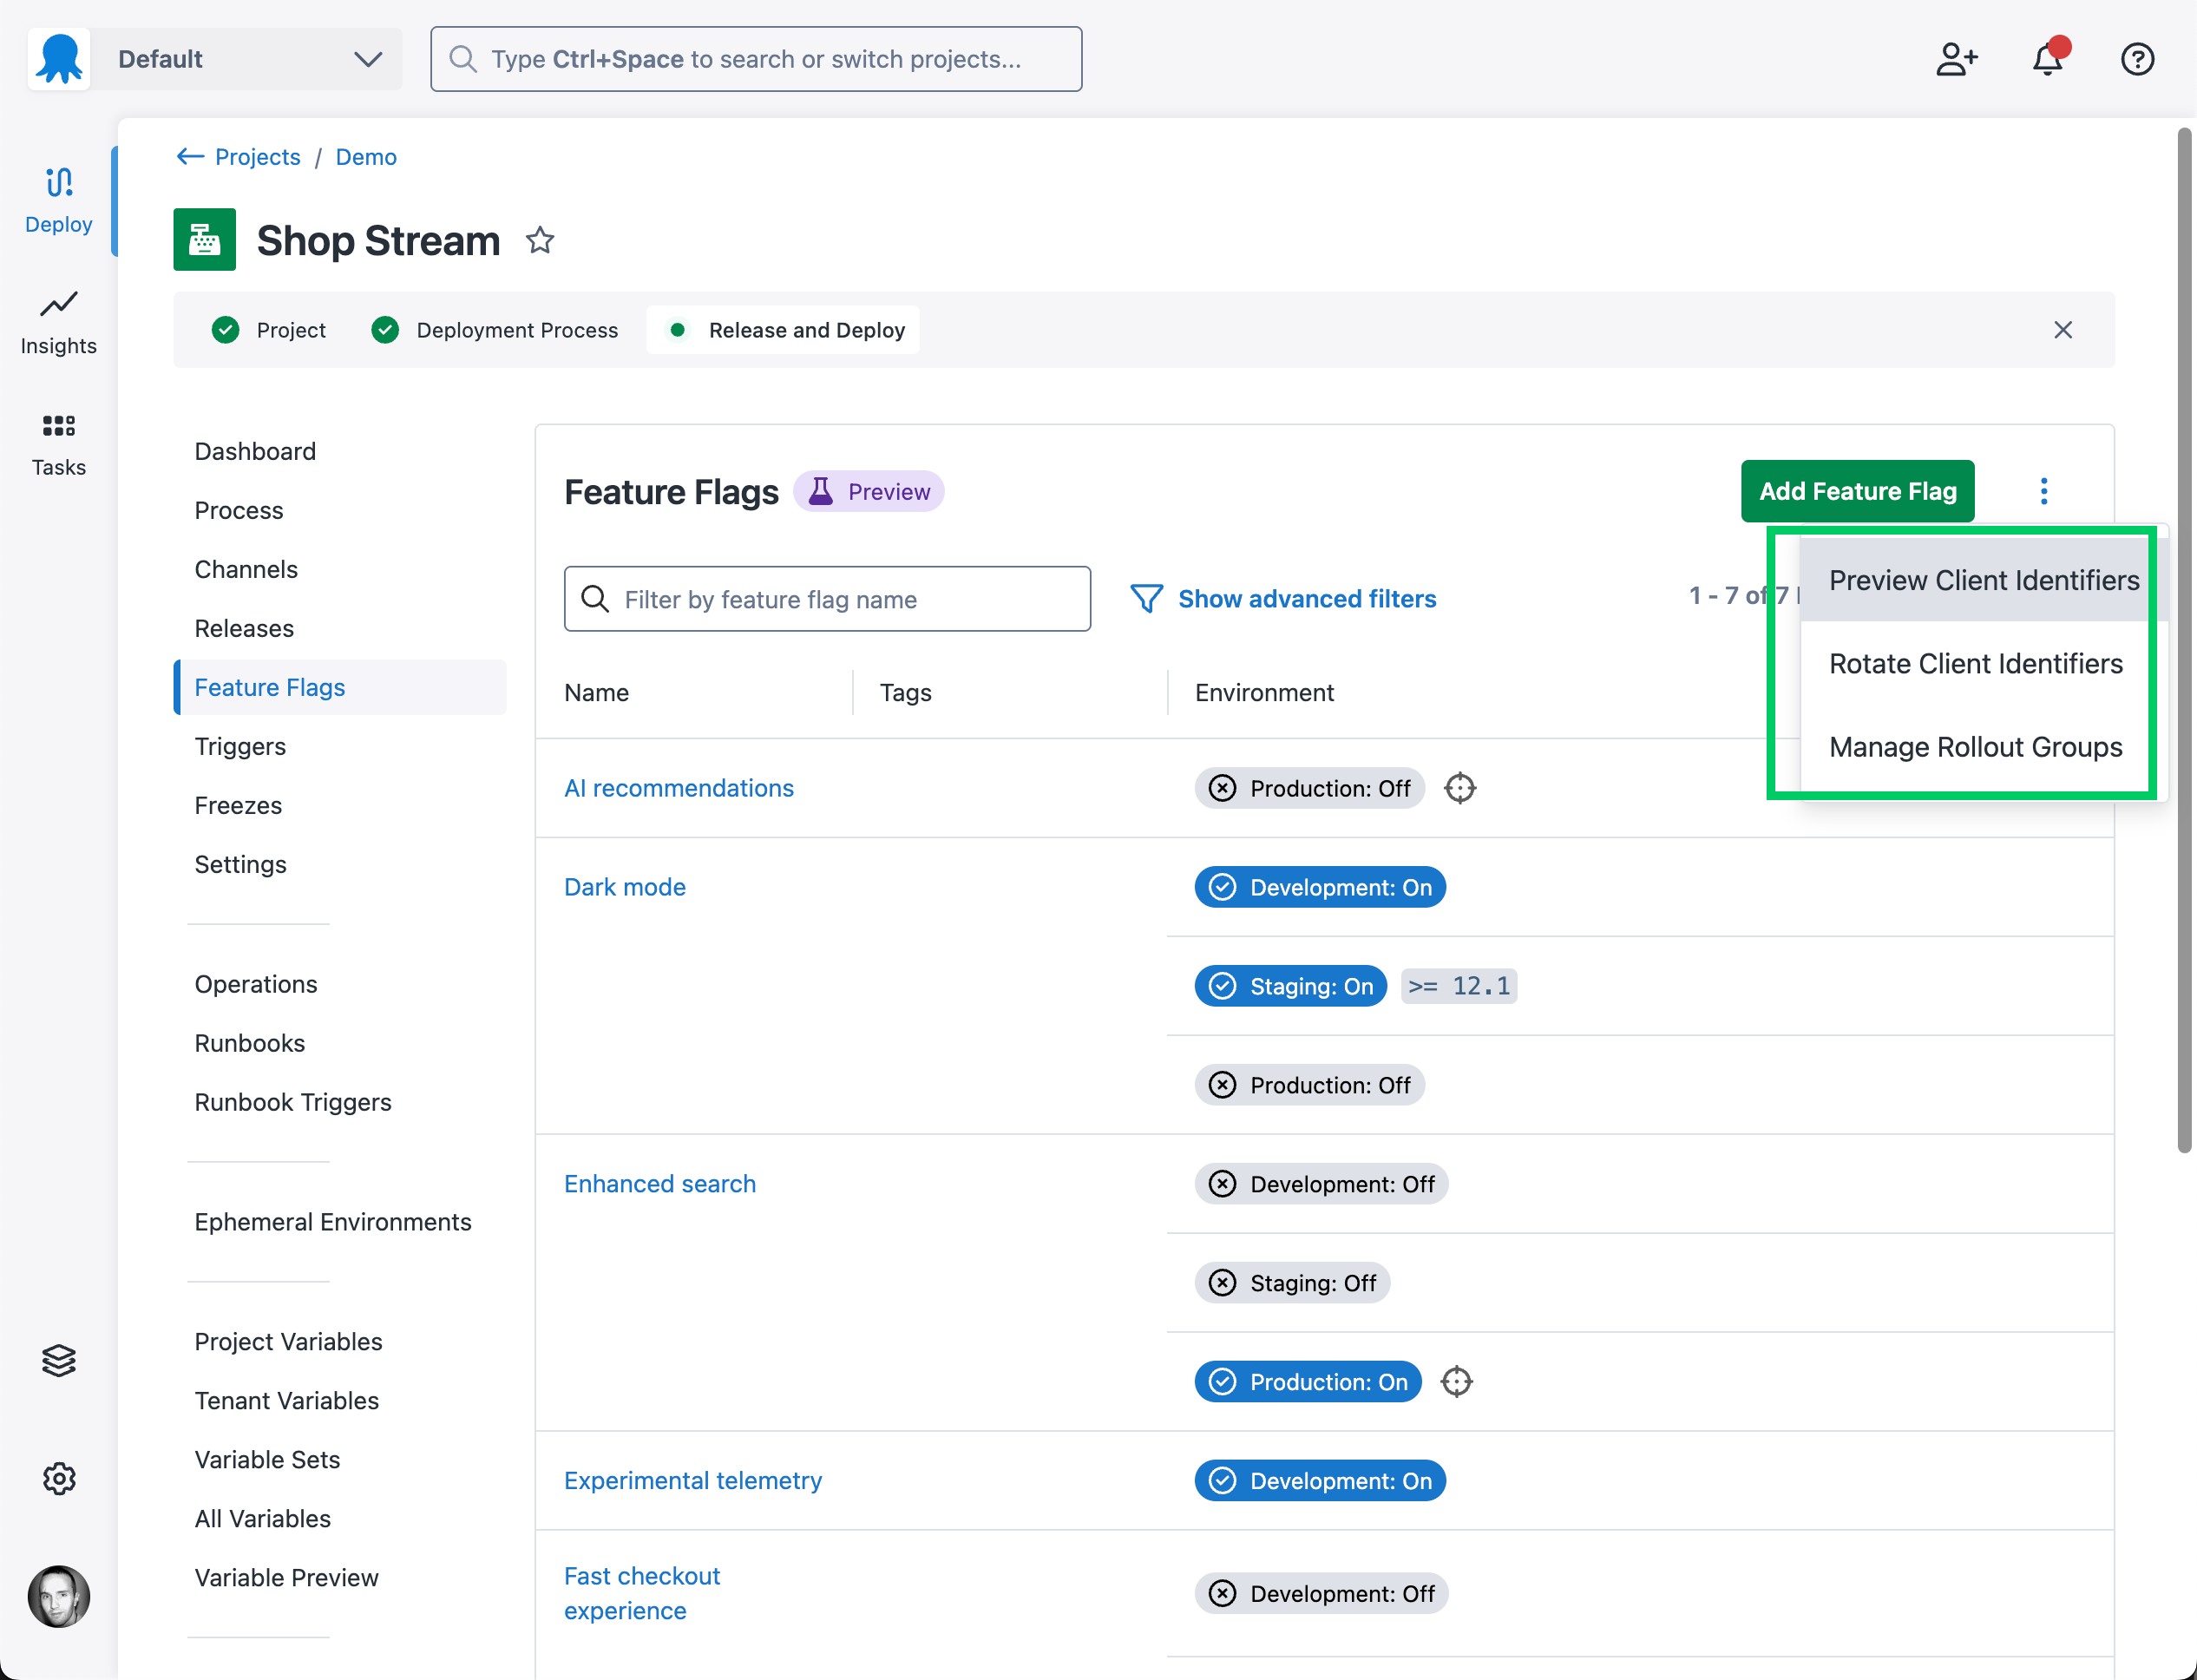
- Open the overflow menu and select Preview Client Identifiers.
- Select the Environment, and the Tenant if your project uses tenants.
- Copy the client identifier into your application’s configuration.
A generated client identifier doesn’t carry the version of a deployed release, so flags that use a Version is at least condition won’t match for applications that use it.
Evaluate a feature flag
Your application asks OpenFeature for a flag’s value by its slug wherever it needs to decide whether to show the feature.
To evaluate a feature flag:
- From your project, select Feature Flags, then select the flag.
- Copy the flag’s Slug.
- In your application, call the OpenFeature client with the slug and a default value.
For example, to evaluate the flag with the slug dark-mode in C#:
var featureClient = OpenFeature.Api.Instance.GetClient();
var darkModeEnabled = await featureClient.GetBooleanValueAsync("dark-mode", false);The second argument is the default value your code uses if it can’t reach the Octopus feature flag service. To learn how it differs from the default value you set in Octopus, see Default values.
Turn on a feature flag for an environment
A new flag returns its default value everywhere until you add an environment to it. Adding an environment gives the flag a switch for that environment, which turns the flag on for everyone there.
Before you begin
You’ll need:
- An environment in one of your project’s lifecycles.
To turn on a feature flag for an environment:
- From your project, select Feature Flags, then select the flag.
- In the Environments section, select Add Environment.
- Select the environment.
- Save the flag.
The environment appears in the flag’s environment list with its switch on, and applications in that environment get true for the flag.
To turn the flag on for only some users in the environment, add rules. See Targeting users with feature flag rules.